End of Life Announcement for Palo Alto Networks Expedition
We are excited to share some great news with you, as a valued user of Expedition functionalities. We are currently in the process of transferring the core functionalities of the tool into new products. This strategic move aligns with our commitment to meet the evolving needs of our customers and enhance our range of product offerings.
Starting from January 2025, Palo Alto Networks will no longer support the Expedition tool, including all versions of both Expedition1 and Expedition2 branches. We believe this transition will bring even more value and improved capabilities to our users. For more details, please refer to Live Community site.
Introduction
The Expedition 2.0 tool aims at facilitating the consumption of PANOS features and assisting on the correct application of good practices in on NGFW devices.
For instance, the tool can assist on the implementation of security policies using Applications, Users and Regions,
the reduction of number of address and service objects to increase policy administration
and advising on potential configuration inconsistencies and deficiencies to help placing the focus on those relevant points, among other features.
To achieve the above-mentioned features and more, the Expedition tool has been structured as a set of modules where each of them covers a role.
This separation of concerns, allows each module to evolve and improve the overall functionality, increase reusability and reliability.
The modules are:
- Expedition Web API: Exposes all the Expedition functionalities via an Application Program Interface that offers high level of scripting and automation
- Expedition Web UI: Provides a web interface that offers access to all Expedition functionalities with a low learning curve
- Expedition Parser: In charge of parsing and translating third party vendors' configurations into PANOS firewalls and Panoramas
- Expedition Analytics: Offers functionalities for traffic log analytics, rule improvement suggestions, and other "data analytics"-related tasks
As most of the Web APIs, Expedition has exposed the functionalities making use of routes and HTTP verbs. The routes (URL paths), indicate the object or objects that are targets for an action, while the HTTP verbs (GET, POST, PUT, DELETE) indicate the action to be applied on such object.
For example, the following request describes a request to list (GET) existing address objects in MyProject.
GET https://localhost/api/v1/project/{project_id}/object/address
Note that, even we are in the first version of the API, we have already started applying versioning strategies to support future modifications of the API and allow the coexistence of more than one version on the same Expedition and future support backwards compatibility.
The different verbs that we can use translate to
GET: List one or more entries
POST: Create a new entry
PUT: Modify one or more existing entries
DELETE: Delete one or more entries
Depending on the user’s permissions and the requested routes, the responses may differ, as some users may have more or less privileges to list/create/modify/delete existing objects in Expedition.
Expedition-API Documentation & Testing
Expedition offers a web resource for documenting the Expedition API and trying it out to learn how to use it. The documentation is based on the Swagger framework, and is provided in each Expedition VM under the following URL:
https://localhost/api/<version>/documentation
In order to be able to consume the different API methods, it is necessary to have a valid session (for authentication and authorization).
This can be performed in Swagger by making a first request to the /api/v1/generate_api_key route.
A request is made by clicking on the selected route to call, activate the interactive mode via the button Try it out,
entering the required parameters and clicking on Execute.
Expedition provides an initial administrator user that can be also used for testing.
The defaults are login: admin and password: paloalto and are already presented in Swagger.
In this case, we will get a response containing an api_key that can be attached to future requests to validate the user’s session and permissions.

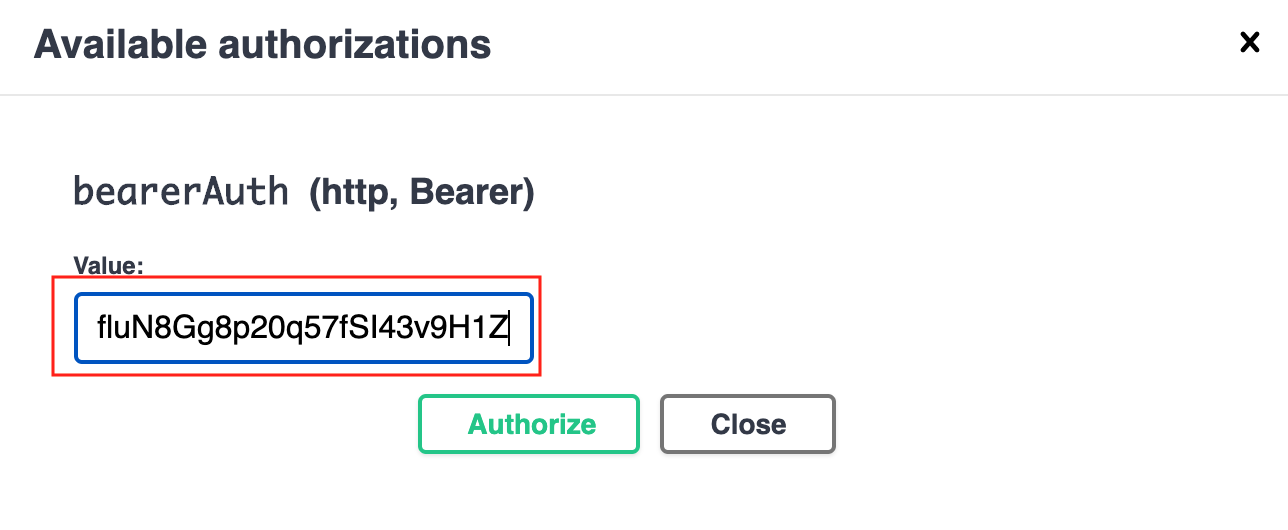
Copy the api_key and paste it in Swagger under the Authorize button that you will find on the top of the site.
After this login activity, all future requests will be authenticated using the provided api_key.


Alternatively , you could also do it via your script:
Make a POST request to the Expedition’s hostname or IP address using the administrative credentials, where you will have to replace the fields YourExpeditionIP, username and password with your actual values. Refer to the Obtaining the API Keys section to obtain a valid API key stored in the hed variable.
A successful API call returns, within the Contents section, status="success" along with the API key within the api_key element, found under Contents->response->data->content:
{
  "Type": "success",
  "success": true,
  "Contents-Format": "json",
  "Contents": {
    "code": 0,
    "success": true,
    "cacheable": false,
    "metadata": {
      "execution-info": {
        "execution-time": 0,
        "execution-memory": 0,
        "execution-disk-consumption": 0
      },
      "request-info": {
        "request-method": "",
        "request-query": "",
        "request-time": "",
        "request-client-user": "",
        "request-client-ip": "",
        "request-client-agent": ""
      }
    },
    "response": {
      "total": 3,
      "current-page": 1,
      "per-page": 10,
      "total-pages": 1,
      "state": 0,
      "job-id": 0,
      "response-messages": {
        "total": 1,
        "code": 0,
        "messages": [
          {
            "message": "Authentication successful",
            "details": {
              "type": "success",
              "causes": {
                "module": "expedition-api",
                "code": 0,
                "description": ""
              }
            }
          }
        ]
      },
      "data": {
        "fields": null,
        "columns": null,
        "content": {
          "api_key": "lyEg5P87DMjLm8dAUm2PZbpYtxLBp9aW7VDldkVjOzcYuE5QscqlUAspchkOIVQQCAYSbbGK3NKKhJFpEj80X44nAZzVO1zA8p87Fs1PfluN8Gg8p20q57fSI43v9H1Z",
          "csrfToken": "MTU5OTg1Nzk2ODE4V3p4WDdtV3BSSldSMFVjSmM0Ykd2YkFqc1cydlJR",
          "id": 1
        }
      }
    }
  }
}